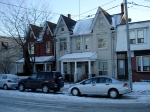
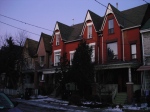
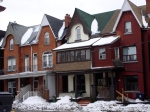
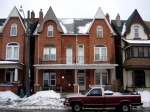
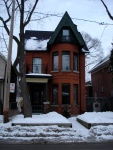
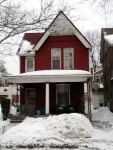
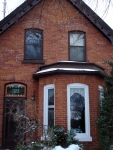
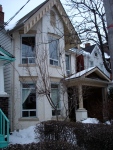
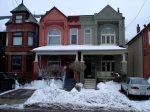
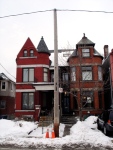
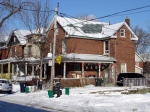
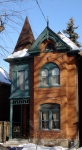
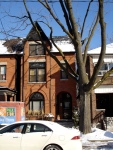
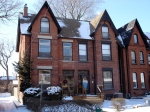
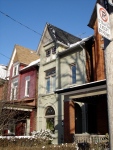
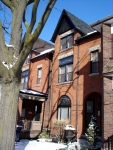
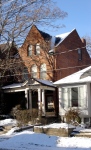
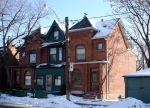
Feeds:
Posts
Comments

The Cabbagetown Historical Preservation Association takes the preservation of Toronto’s Victorian housing seriously and with good reason – Cabbagetown is the largest stretch of Victorian housing in North America. On their homepage they have made available the resource, “What Style is My House” which is good reading for anyone who can’t identify the historic home they live within.

This is an invaluable resource for those of us who had no idea they had bought a Century Victorian because there was little left to identify what the original house had looked like. For whatever reason, downtown homes, outside of the trendy preservation districts, tend to be hidden under layers of aluminum siding, inappropriate additions and a host of other measures over the years that often results in a house that stylistically “does not make sense”.

The Cabbagetown Preservation guide is oriented to Torontonian architecture with detailed styling points for Georgian, Queen Anne,  Romanesque, Gothic and Arts and Crafts styles. Two styles of housing are unique to Toronto: The Bay and Gable and the Annex House. The guide, however, only identifies the Bay and Gable. The annex home is a unique combination of Romanesque and Queen Anne that is characterized by mass, permanence and the exuberance of Queen Anne features. These houses are seldom seen outside of Toronto’s Annex.

This guide may also be of interest to Americans who are curious how uniquely American styles departed from English architectural heritage.

West Toronto Junction, or just “The Junction“, is unique in stade Toronto “The Good”. The Junction, named for the crossing of the Canadian National (CNR) and the Canadian Pacific (CPR) railways, was a booming prosperous late 1890s town with businesses breaking the bulk of the railway, lumber yards, stock yards, a flour mill, a foundry, and included factories that manufactured Nordheiner and Hienztman pianos, in addition to the Canadian Cycle Manufacturing company. Founded in 1884, the Junction later amalgamated with Toronto in 1909 and is currently celebrating the centennial since becoming part of Toronto.

Up until 1997, the Junction exercised local option in being a dry community after prohibition in 1904 (Fancher). At the turn of the century the area had the reputation for heavy drinking, street fights and prostitution that came with many young men migrating into the city for jobs in the new industrial factories.

The active West Toronto Junction Historical Society maintains an archive of Junction historical documents and photos, in addition to producing publications and historical tours of the Junction.

Some of oldest houses in West Toronto Junction date to the 1880s. Many Victorian Bay-and-Gables, identifiable by their tall narrow stance, octagonal or square bays, and steeply pitched peaks can be found closer to the heart of the original town. Larger commercial buildings line the central strip of the Junction along Dundas Street along with many church steeples, library and Mason’s Lodge that were and are a part of the City of West Toronto Junction. Later Edwardian homes were built as part of the expansion of Toronto suburbs located farther away from the “main strip” of the town.

THE LEADER & RECORDER’S: History of the Junction. Diana Fancher, Editor. ISBN 0-9686636-1-3

Circa 1850 Polymerized Tung Oil Varnish

Circa 1850 Polymerized Tung Oil Varnish

The original door on the house is a Queen Anne style that was unfortunately painted with the cheapest grade latex paint. This style of door can be found on many late Victorian Queen Anne styled Bay-and-Gable homes in Toronto.

After some research, Tung oil seemed like the the best possible finish.

Stripping layers of paint off the door revealed a honey pine stain on the exterior and a dark reddish stain that is the base coat on all of the interior wood work. This dark stain was used as the base for the interior Victorian tromp l’oeil faux oak finish. Paint stripping was time and I am loath to even recall the ordeal. I discovered too late that a carpenter in the area would have been able to  do the work at a reasonable rate, which I would suggest. Otherwise, you will be working with methyl chloride which is a very harsh chemical that is a VOC solvent and not terribly ”green”.

First coat of stain applied

First coat of stain applied

Of course, follow usual guidelines when you suspect lead paint (see post on refinishing hardware). More environmentally friendly chemicals should be used if you are lucky enough not too have too may layers to remove.

First coat of Tung oil varnish

First coat of Tung oil varnish

I wanted as period a finish that I could achieve and that meant was very reluctant to use a polyurethane. The plastic coated look of polyurethane finishes are not very attractive to my eye.

After some research, Tung oil seemed like the the best possible finish.  Tung oil, the oil from a Chinese nut producing tree, has been used for centuries to water protect wood on Chinese sailing junks. The oil naturally polymerizes itself by linking up the molecules into chains creating a beautiful finish that repels water and allows the wood to breath. The finish is not “oily” in the least, is dry to touch and hardens to protect the wood. Best of all, with a light sanding, the finish can be touched up and renewed at any time.

I used Circa 1850 polymerized Tung oil varnish. Polermerized tung oil has been heated to encourage even more molecular cross linking during the curing process and has been traditionally used a Marine Spar varnish on beautiful wood hulled power boats.

Paint was removed using a few specialized scrapers for the moulding. Plenty of steal wool was used to remove paint and old varnish from the grain. This raised the grain of the wood which allows stain to be taken up. The door was sanded with 80 grit paper, then 120 grit paper, then 150 grit paper and finally 220 grit paper.

Entrance, The Frick Collection, NYC

Entrance, The Frick Collection, NYC

The 120 year old door had an amazing heart pine grain. Since it was a soft wood, a coat of wood conditioner was applied prior to stain to ensure the stain was soaked up within the wood in an even manner. Three coats of stain were applied allowing 24 hours of drying between coats. Then three coats of Tung oil varnish were applied scuffing the finish with fine steel wool between coats. A visit to the Frick Collection in New York provided the inspiration for our choice of stain colour. Of course, I had to make this enterprize more difficult than it needed to be, but the hue of the stain was perfect, very warm and complemented the golden hues of the aged heart pine of my far more modest door.

The result was better than anticipated and the stain and tung oil really brought out the antique patina of the aged wood.

Three coats of Tung oil varnish

Three coats of Tung oil varnish

Antique front doors are a bargain at most architectural reclamation stores. Partly because, many home owners are not willing to take the trouble to either refinish the original door or have  a carpenter fit in a suitable antique period door. Nonetheless, the very minor additional effort is worth the results. A big box steel door on a period home is an act that frees space in hell for lost souls. While I had the original door to work with, it can be great fun picking out the perfect door at your local salvage shop.

Those of us who are more academically or artistically inclined may experience difficulty conforming to the linear timeline of a typical house project. This limitation of mind is hard to accept. My preference is to rely on inspiration to start projects, spread my energies across many projects at a time, while always maintaining my faith that it is my process, and not pragmatic goal directed behaviour, that will produce results that cannot be faulted. 

This works for me on small projects without the need to ignore too much counterfactual evidence. Now when contemplating a bathroom or kitchen reno, or larger contracted work that is far less inspiring than installing crown moulding or restoring stained glass (think: HVAC, electrical, etc.), I reach my own limits of mind and descend into a disorganized abyss.

So if you find yourself partnered with a more managerial linear thinker, he or she may insist that you plan those damn house projects. Presumably, self preservation on their part …

House Project Planner Template (MSword .doc)

For those that have grown weary of paying for buggy frustrating software, the template has also been saved in the incredible Open Office productivity suite which is a freely downloadable (http://www.openoffice.org/) open-source alternative to MS products. 

House Project Planner Template (Open Office .odt)

The basic template organizes multistage projects, the priority rank of the project, estimated and actual timelines and costs and completion dates. Alter and change the template as you need.

Note on WordPress ads: Occasionally you may see ads on this blog placed by wordpress.com. These are not endorsements on my behalf and will be tolerated until I find a non ad hosting alternative. 

The Victorians were fond of making the ordinary appear extraordinary, especially when the extraordinary exceeded one’s reach.

Faux finishes are not limited to late 1980s interior decor or to low budget “trading rooms” television programming. The Victorians were fond of making the ordinary appear extraordinary, especially when the extraordinary exceeded one’s reach. I found some original Victorian wood graining under layers of paint that easily peeled off. The art of trompe l’oeil, “to trick the eye”, used an elaborate painting technique to simulate quality hard wood grain on softwood or marble on plaster. More elaborate applications would apply decorative frieze or even painted simulated scarves over doors or birds on ceilings (Guild, 2008). As I expected, there is very little new in post-modern aesthetics… Apparently, trompe l’oeil applications were most popular near the lat 19th c. and used in small and grand houses alike. Skilled artists gained prominence and were sought after for their work in the best homes.

Original Oak Painted Finish

Original Oak Painted Finish

The oak appearing on my door would have first been painted with a deep beige base colour that would then have been glazed with burnt umber and ocher to give it light and dark highlights. The artist would then pull a multi-toothed brush through the glaze to produce the grain by revealing the base coat, then finish by flogging with the brush to break up some lines (Guild, 2008).

Trompe l'oeil Oak Finish on Pine

Trompe l'oeil Oak Finish on Pine

Many homes will still have these finishes preserved under layers of paint. These finishes can actually be restored by using solvents to rub down to the trompe l’oeil finish that is protected by glaze (Nigel, 1997). Paint stripping will destroy these original features. Leaving the finish under paint is an accepted preservationist approach.


Guild, R. (2008). The Victorian House Book: A Practical Guide to Home Repair and Decorating. Firefly Books.

Hutchins, Nigel. (1997). Restoring Old Houses. Firefly Books.

Old windows are so worth saving and so much a part of a house’s style and character.

Unfortunately, many old houses have lost their windows after manufacturers claimed thermopaned windows offered such superior

Wood planing the bottom edge of the storm window

Wood planing the bottom edge of the storm window

energy effeciency. Civil engineers from the University of Vermont, The Vermont Energy Investment Corp., and the U.S. Army Cold Regions Research and Engineering Laboratory (James et. al, 1996) presented evidence that the savings of removing old windows and replacing with thermopanes is so small, that it may take over 80 years to recoup the investment – longer if the original windows are properly maintained. A well-maintained original wood sash or casement window with storm window offers many other advantages, including the ability to abate a larger amount of ambient and street noise due to the larger distance between each pane. Original windows will also last a lifetime if properly maintained. This justifies repairing the existing window when needed. Sedovic and Gottheif’s report (at traditional-building.com) addresses many of the overblown claims made by replacement window manufacturers and the advantages of well maintained historic windows.

There are also security issues with “vinyl” windows, since they are not as strong as wood frames. Vinyl framed windows cannot normally be painted

Brass fastener

Brass fastener

either, further detracting from the original character of your home. This is to say nothing of the fact that once you are on the “replacement window” schedule, you can expect to have to replace the thermopanes once the gas escapes and the moisture infiltrates the unit resulting in a lovely “fogged window”.

I guess it is really not necessary for me to directly state my abhorence for vinyl windows, especially since the POs installed a couple of them. I can’t wait for a few of them to start “popping” so I have a reason beyond aesthetics to get rid of them and have custom antique sash windows installed.

Anyways, instead of replacing a wonderful old Queen Anne divided-top window with stained glass, I decided to repair it and have a custom milled storm window made by Hoffmeyer Mills located in Sebringville Ontario. The mill still uses the original machinery dating back to the 1870s. They told me that the storm was one of the largest made in recent memory at the mill and

Installed and in keeping with the look of the original windows

Installed and in keeping with the look of the original windows

their work, using traditional mortise and tenoned joinery, was excellent. Given the ambient noise of urban life, I requested that the window be glazed with 4 or 5 mm glass. The mill requested specific measurements and it only took a small number of runs with the hand planer to get a perfect fit. I used a simple compressible foam weatherstripping and antique styled brass fasteners and interior latch locks to hold the window in place. The result is no drafts whatsoever and I cannot even hear a delivery truck rolling by while reading the paper. Well worth it.

I wanted to put up bead board in a small laundry room, but lost enthusiasm for the project after realizing I would need to spend a couple of hours nailing boards over my head. So perhaps I did not really need a pneumatic Brad nailer, but now that I own one, I have tons of ideas for more projects! As if there were not enough items on our “to do” list. 

The unremarkable "before shot" made worse by the "track lighting"...

The unremarkable "before shot" made worse by the "track lighting"...

Tools and Materials:

  • Brad nail gun
  • Mitre saw
  • Stud finder
  • Chalk line
  • Pine beadboard
  • Pine crown molding
  • Measuring tape

I choose a small room to gain some experience working with the nail gun.

Paint or prime the beadboard first. This will ensure the tongue and grove of the boards are fully covered as it will be hard to get into any uneven joints once the boards are up. For this project, I used a lower grade pine that was meant to be painted. Using the nail gun will also ensure that you do not split boards and that you do not leave hammer marks or nail heads that need to be putty filled.

Snapped chalk lines

Snapped chalk lines

To put up a bead board ceiling, I first used a stud finder to locate the ceiling joists and then snapped a chalk line to mark their location. The beadboard should be installed perpendicular to the joists so that you get solid wood stock in which to nail.

It is recommended to leave around a 1/4 inch gap to account for expansion of the boards. This gap will be covered by your trim. If the beadboard is going to be installed in a humid room, then you may also want to back prime the boards so they are less susseccible to expansion.

If your ceilings are not true (and chances are they arn’t true) then you may want to account for the irregularity to ensure that the bead will line up and run parallel with the trim molding. This room is a small “scullery” and I did not bother with the added fuss and the slight irregularity is not noticeable at all. The first board should be face nailed, but after that board I “toenailed” the boards to hide the nail heads within the tongue and grove of the beadboard.

Mitre cut the crown molding

Mitre cut the crown molding

Some boards may be so warped that you won’t be able to use them on long stretches, but can be salvaged to work around light boxes. I tried to keep the alignment of the tongue and grove as tight as possible so there were no obvious gaps.

Once it is all nailed up, then it is time to cut the crown molding. I thought this would be easy, but the experience brought back my regrettable experience of high school math. How to cut a mitered corner is a post in itself… there are some good guides online and your saw’s owners manual should give you the angle degrees you need for the right cut.

Not the hardest work to get a classic period look

And done

Using the Brad nailer is fun, quick and easy, just do not forget the ear and eye protection. Beadboard looks great in an old house and gives it some Victorian character where there would otherwise be drywall.

Many jobs that are an avoidable chore can be wrapped up quickly with a brad nailer. Most small compressors will be able to handle basic 18 gauge brad nailing. It can be confusing, since compressors are rated by both their maximum pressure per square inch (PSI) and by the amount of continuous air they can provide to your tools (CFM Cubic Feet per Minutes). My smaller compressor for household use will deliver around 3.7 CFM at 40 PSI and 2.6 CFM at 90 PSI.

dsc02186

Both the size of the tank and how powerful the compressor is will impact these ratings, so compressor HP or tank size alone is not the best indicator of your machine’s air delivery. This is enough power for brad and frame nailing or light spray painting and less continuous use of a smaller air chisel or air ratchet. Other tools that require continuous air delivery, like a powerful orbital sander or polisher, would need a much bigger compressor and tank. As always, the right tool should be matched for the job. Using a small compressor with a high CFM tool on a big continuous use project will just take usable years off your machine’s life.

A nailer with an adjustable exhaust port is not essential, but will help keep the air exhaust from blowing in your face when working awkward angles. Most air tools have a maximum PSI rating and a range of operable PSI. While your compressor may be rated at a higher PSI, you will have to use the regulator to adjust the PSI provided to the tool. A good nailer will also allow you to adjust the depth of the nail and that adjustment will depend on the range of PSI provided to the tool. This sounds complicated, but only requires a few test nails to get the depth you need for the material you are working with. 

Rubber compression hoses seem less stiff and easier to work with than PVC hoses, but this is not a big deal if you can save money with a packaged kit that includes the hose.

1/2" to 2" Brad nailer

18 gauge, 1/2" to 2" Brad nailer

This is one tool where the owners manual should be read. Also, most compressors need a break in period of continuous run time with the bleed valve open. Air tools and compressors also require specific maintenance routines that should be followed, such as bleeding condensation out of the tank to avoid corrosion.

I caught a bit of luck in that the POs (Previous Owners) did not remove the antique pine front door and replace it with a Big Box pre-hung door. Of course the door was layered in paint and the original antique mortise lock was replaced with a typical off-the shelf lock for a bored-door.  This is the modern way in which locks are fitted to doors, while antique houses would largely have had their doors fitted with mortise or rim locks.

The not completely unattractive, but completely inappropriate new lock

The not completely unattractive, but completely inappropriate track mansion lock

While the new lock was not completely unattractive (relatively speaking I suppose), it unfortunately meant that one of the POs bored a hole in the door, right through the mortise so that a modern lock could be installed. This meant that a antique mortise lock could not just be fitted into the door without repairing the hole that was made for the lock. Minor headaches, but not an impossible fix.

To fix the hole in the door, I had a local carpenter fix a “plug” to the diameter and width of the door. A bit of sanding, carpenters glue and wood epoxy and I had restored the door. Some chisel work removed wood from

Wood plug to fill bored door hole

Wood plug to fill bored door hole

the plug to restore the space for the mortise.

The inner workings of the lock are fascinating and it still has a solid and clean working mechanism.

The reason for all this was because I love house hardware and really wanted to make use of the antique bronze Eastlake styled mortise lock I picked up. It is a great piece of hardware made by Corbin in 1878 and matches some existing Eastlake hardware within the home.

Corbin apparently still manufactures door “furniture” (a UK and rarer Canadian usage) or hardware at a factory in Berlin Connecticut. The company started off as  Corbin Russwin in 1839 manufacturing plate locks.

The escutcheon plate has a swing key hole cover that is meant to prevent outside drafts. The inner workings of the lock are fascinating and it still has a solid and clean working mechanism. Of course, a deadbolt should be used for real “security”.

The anatomy of a mortise lock

The anatomy of a mortise lock

Luckily, the mortise lock’s face plate fit my mortise well. It is important to get the “back-space”, that is the distance from your door’s edge to the centre of the door knob accurate if you are fitting a lock into an existing mortise. Since the door was bored, I could re-drill the appropriate length backspace into the new wood plug, meaning I did not have to endlessly search for the perfect mortise lock with the right backspace for my door.

Eastlake Corbin bronze hardware

Eastlake Corbin bronze hardware

Now I just have to get rid of that Big Box storm door...

Now I just have to get rid of that Big Box storm door...

After fiddling with repairing the door, it was simple to install the mortise lock, the escutcheon plate, attaching the door knobs to the spindle, securing the set screws on the spindle and enjoying a moment of amazement that a downtown Toronto dude once living in a concrete box on the 22nd floor of “apartmentopia” could somehow pull it off! Houses are fun that way. It was amazing how easy it was once the door was repaired. It just worked the way it was intended to. No headaches trying to force new hardware or materials that were not intended to be a part of an old house.

And done.

And done.

Industrialism resulted in the wide availability of architectural millwork that was once only available to wealthy clients building the best of homes. Late Victorian or “High Victorian” millwork was the most elaborate and suited popular Victorian revival styles of the time including Queen Anne and Eastlake. Hull (2003) refers to the period 1890-1910 as the “Golden Age” of American architectural millwork. During this period wood was plentiful and cheap and there existed the right mix of artisans, craftsmen, and manufacturers that produced styles that were ornate, elaborate and expressive. According to Hull, the end of this great period of millwork followed the Depression era, when wood was no longer affordable and modern options, such as hollow core doors, became widely used, marking the end of historic millwork.

Many of the early millwork companies started off as lumber yards and success and growth was the result of industrialization and proximately to the railroad (Hull, 2003). It is probably no coincidence that my old Vic was built in 1889 by a local lumber barron whose business was located near the railway in the emerging industrial city of West Toronto Junction.

The Victorians did not consider most softwoods to be noble enough to stain and hence most pine interior trim would have been painted or artistically grained to reproduce the look of solid English oak.

Wood mouldings were produced from various hardwoods and softwoods with hardwoods, such as Oak and Mahogany, limited to the public rooms in grander homes. Characteristic of Victorian domestic culture, there was a strong demarcation between public rooms, that received the most ornate moulding, and the private spaces of the house that received more modest treatment (Webb, 2002). The ornate, thick and deeply milled door and window casings made mitre work more challenging for carpenters. Corner blocks, while seen as added ornamentation to contemporary eyes, were used to increase the efficiency of building wood casings and avoided highly precise mitre work (Webb, 2002).

The Victorians did not consider most softwoods to be noble enough to stain and hence most pine interior trim would have been painted or artistically grained to reproduce the look of solid English oak. Frequently the original painted graining is preserved under subsequent layers of paint. Patient restorationists can use methyl hydrate on a cloth to rub down to the original painted grain that is protected with shellac (Nigel, 1997).

Hull, Brent. (2003). Historic Millwork: A Guide to Restoring and Re-creating Doors, Windows, and Moldings of the Late Nineteenth Through Mid-Twentieth Centuries. Wiley.

Hutchins, Nigel. (1997). Restoring Old Houses. Firefly Books.

Webb, Kit. (2002). The Victorian House. London: Aurem Press.

Older Posts »